
0%

Choosing the right Dual Curve Makeup Sponge is not simply a matter of picking the softest option. Shape, density, material, and surface texture all influence the final finish. A well-designed dual curve can reach the inner eye, nose corners, cheek hollows, and jawline with less stretching. Yet comfort matters as much as reach. A sponge that feels clever in the package may feel awkward against real skin.

Makeup artist and educator Wayne Goss has shared a useful principle: “The best makeup is invisible.” That idea guides this comparison. The best Dual Curve Makeup Sponge should distribute foundation evenly, reduce visible streaks, and leave the skin looking like skin. Its rounded side should blend broad areas smoothly. Its curved edge should handle narrow spaces without dragging. Its pointed section should remain gentle, not sharp or scratchy.

Small details can change the result. A damp sponge usually creates a lighter, fresher layer. A dry sponge may provide stronger coverage, but it can absorb more product. Latex-free foam is often preferred for sensitive users, although “hypoallergenic” claims still deserve careful checking. Clean the sponge after use, and replace it when cracks, odor, or permanent staining appear.

There is no perfect shape.

Some assumptions need reconsidering. A premium price does not guarantee better control. A softer sponge is not always more hygienic. This guide examines practical testing points, including bounce, rebound, product absorption, edge precision, and cleaning performance. The goal is a balanced choice for daily makeup, professional kits, and different skin textures.
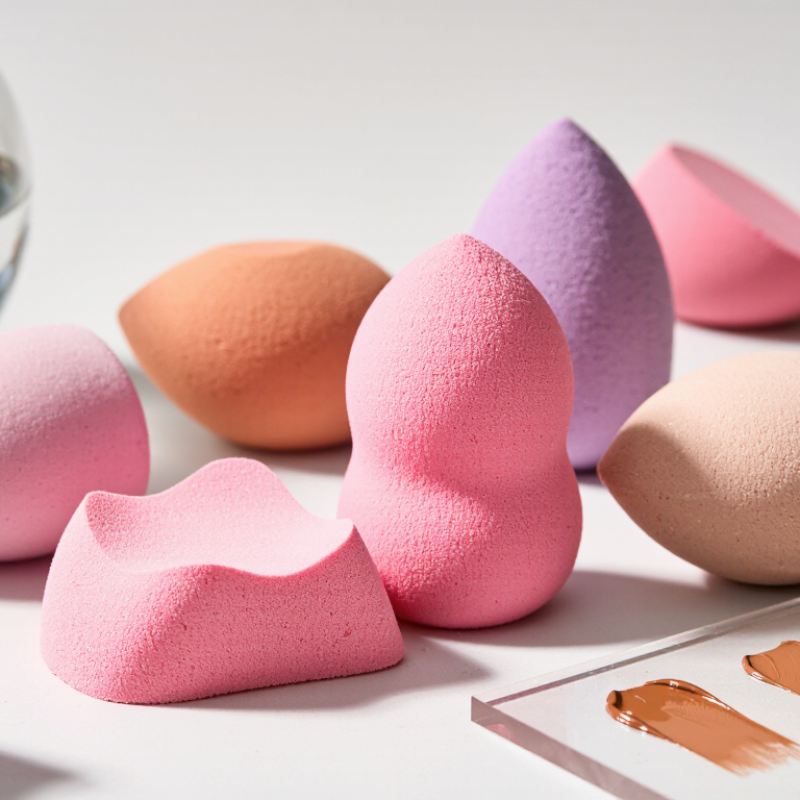
How to Choose the Best Dual Curve Makeup Sponge?

Understanding Dual Curve Makeup Sponge Design and Function

A dual curve makeup sponge has two shaped surfaces for different jobs. The broad, rounded side covers cheeks and forehead, while the narrower curve fits beside the nose and under the eyes. Its edge can soften foundation near the hairline. The design reduces tool switching, but it does not guarantee an even finish; pressure and dampness still matter. A sponge that feels too firm may leave visible streaks.

The shape also affects control. A rounded surface spreads product across larger areas, while a tapered section can place concealer around the inner eye. Use a bouncing motion, not a drag, to build thin layers. Circana reported that U.S. prestige beauty sales rose 14% to $31.7 billion in 2023, showing continued momentum in the beauty category. That industry figure is broad, not specific to sponges, so it cannot prove one design performs better.

Tips: Dampen the sponge, then squeeze out excess water until it feels springy, not wet. Use the wider curve for foundation and the smaller curve for detail. Wash it regularly and let it dry fully. I still find the narrow tip awkward on some faces; shape alone cannot replace a light hand.

Identifying Your Skin Type and Coverage Needs

A dual-curve makeup sponge can make different parts of application easier, but your skin type and preferred coverage matter more than its shape. If your skin feels dry or flaky, dampen the sponge and press foundation gently over the cheeks. A moist sponge can soften the finish and reduce the look of product sitting on dry patches. If your skin gets oily, use light layers and wash the sponge after each use. It will not control oil, but clean tools help avoid spreading old makeup and residue.

Think about the coverage you want. For sheer coverage, tap a small amount of tinted product across the rounded side. For more coverage, use the flatter curve to press product around the nose, chin, or areas with visible redness. The narrow edge can reach beside the nostrils, though it may take a little practice. A sponge can lift away some product, so build coverage slowly rather than adding a thick layer at once. This isn’t a perfect formula; lighting and product texture can change how the finish looks.

Tips: Dampen, then squeeze out excess water. Test the sponge on one cheek first, and stop if it feels uncomfortable. Rinse it thoroughly and let it dry fully between uses.

How to Choose the Best Dual Curve Makeup Sponge? - Identifying Your Skin Type and Coverage Needs
Skin Type or Preference Typical Coverage Need How to Use the Dual-Curve Sponge Dampness and Application Tips What to Keep in Mind
Dry or dehydrated skin Light to medium, with a natural-looking finish Use the broader, rounded curve to press foundation gently across larger areas. Use the narrower curve around the nose and under the eyes. Dampen the sponge, then squeeze out excess water until it feels soft but does not drip. Press product onto the skin rather than dragging it. Apply moisturizer and allow it to settle before makeup. A sponge can help blend product, but it does not replace skin preparation.
Oily skin Light to full, depending on preferred wear and finish Use the rounded side for an even base and the curved edge to blend around the sides of the nose and hairline. Build coverage in thin layers. Use a lightly damp sponge, or a clean dry sponge if the product directions allow. Set areas that tend to become shiny with a suitable powder. Excess water or product can make blending less controlled. Clean the sponge regularly, especially when using it with liquid or cream products.
Combination skin Light to medium, with extra coverage only where needed Use the broad curve on larger areas and the narrower curve to place concealer or foundation on specific spots. Start with a damp sponge and use a pressing motion. Apply less product on areas that are already even, then add coverage where desired. Different areas of the face may respond differently to the same formula. Adjust product amount and setting steps by area.
Sensitive or easily irritated skin Light, sheer, or targeted coverage Choose a soft sponge with smooth, intact material. Use the broader curve with light pressure and avoid repeated rubbing. Use a clean sponge and fragrance-free products if those suit your routine. Rinse thoroughly after washing and let the sponge dry fully. Stop using the sponge if it causes discomfort. Replace it if it develops tears, persistent odor, or residue that will not wash out.
Visible blemishes or uneven tone Medium to full, built gradually in targeted areas Apply a thin base with the broad curve, then use the narrower curve to press additional product over selected areas without coating the whole face more heavily. Use small amounts and tap gently. Allow each layer to settle before deciding whether more coverage is needed. A sponge can blend makeup but does not conceal every texture difference. Avoid pressing hard over tender or broken skin.
Natural, sheer makeup preference Sheer to light Use the broad curve to spread a small amount of product evenly, then lightly tap to soften edges. Use the narrow curve for detail work. A damp sponge can help sheer out many liquid or cream formulas. Remove excess product from the sponge before blending. Check the product label: some formulas are designed for use with a dry applicator or may give different results when diluted with water.
Fuller, more polished coverage preference Medium to full Use the rounded curve to apply foundation in sections. Use the narrower curve for controlled placement around facial contours and smaller areas. Build coverage with thin layers and a gentle pressing motion. Avoid saturating the sponge with product. Coverage depends on the formula as well as the applicator. A sponge may leave a softer finish, while other tools may provide more direct product placement.

Comparing Sponge Materials, Shapes, and Edge Details

How to Choose the Best Dual Curve Makeup Sponge?

Material affects both finish and hygiene. Latex-free polyurethane usually feels springy and blends liquid foundation smoothly. Silicone-coated surfaces absorb less product, but they can drag across dry patches.

A 2024 Grand View Research analysis valued the global makeup sponge market at over USD 1 billion, reflecting strong demand for reusable application tools. Yet market growth does not guarantee better performance.

I once chose the softest sponge available. It felt luxurious, but its pores held too much foundation.

Shape matters during real application. A dual-curve design should offer one rounded side for cheeks and one flatter side for controlled coverage. The narrow end helps reach the nose and inner eye. A wider base can press product into the jawline quickly.

According to Circana’s 2024 beauty industry reporting, consumers increasingly prioritize multifunctional products and tools. That supports a two-surface design, but only when each curve has a clear purpose.

Edge details can change the finish. A sharp seam may leave visible lines near the temple. A softly beveled edge creates gradual transitions, especially with cream formulas.

Check whether the sponge keeps its shape after dampening. It should expand without becoming floppy.

The wrong choice is possible. Very soft foam feels pleasant, but it may waste product and tear sooner.

Clean it after each use, inspect cracks, and replace it when the surface no longer rinses clear.

Reliable performance is less glamorous than a perfect first impression.

Evaluating Application Performance, Comfort, and Durability

How to Choose the Best Dual Curve Makeup Sponge?

A dual-curve makeup sponge should do more than look sculpted. Test how its rounded side spreads foundation across the cheeks, then use its narrower curve around the nose and under the eyes. A damp sponge should feel springy, not soggy, and bounce back after gentle pressure. Tap product in thin layers; dragging can leave streaks and waste formula. Check the finish in daylight, where uneven edges are easier to spot.

Comfort matters during a full routine. Hold the sponge with wet and dry hands, since a slippery surface can make precise blending awkward. Its curves should sit naturally between your fingers and reach small areas without forcing your wrist into an uncomfortable angle. Softness is useful, but an overly soft sponge may absorb too much product. That balance can be surprisingly hard to judge in a shop.

Tips

Wet it fully, squeeze out excess water with a clean towel, and use light tapping motions. Wash it after use with mild cleanser, then let it dry in open air. Check for seams that stay intact and a surface that resists tearing. Replace it if cracks, persistent odor, or texture changes appear. I sometimes prefer a simpler shape for quick touch-ups; the dual curve is not automatically better for every face or technique.

Choosing, Cleaning, and Replacing the Right Sponge

A dual curve makeup sponge has two useful surfaces: a rounded side for broad areas and a tapered curve for smaller contours. Choose one that feels springy, not stiff, and fits comfortably in your hand. A damp sponge should expand evenly without shedding or developing a strong odor. Check the surface for cracks before buying. Small details matter.

Use the rounded side to blend foundation across the cheeks and forehead, then turn the sponge to reach around the nose or under the eyes. Press and lift rather than dragging; this usually leaves fewer streaks. Wet the sponge, squeeze out excess water, and blot it with a clean towel before use. It should feel damp, not dripping. I sometimes use too much pressure near the nose, and the finish can look uneven, so a lighter touch is worth practicing.

Clean the sponge after each use with lukewarm water and a mild cleanser. Work the cleanser through the curves, rinse until the water runs clear, and let the sponge air-dry fully in a ventilated spot. Don’t seal it in a damp makeup bag. Replace it when it stays stained after washing, tears, loses its bounce, or develops a persistent smell. There is no exact replacement date; usage and care make a difference. If cleaning becomes difficult, replace it sooner.

FAQS

What is a dual-curve makeup sponge designed to do?

It has a broad curve for cheeks and forehead. The narrower curve reaches beside the nose and under the eyes. Its edge can soften makeup near the hairline. One tool, fewer switches.

How should I use the different sponge surfaces?

Use the rounded side for larger areas. Use the tapered curve for concealer and small contours. Press and lift gently instead of dragging. A light bounce usually creates fewer streaks.

Should the sponge be wet or dry?

Dampen it, then squeeze out extra water. It should feel springy, not dripping. Blot it with a clean towel if needed. Too much water can weaken coverage.

Which sponge technique works for dry skin?

Press a damp sponge gently over dry or flaky cheeks. Build thin layers instead of adding a thick coat. The finish may look softer. Still, texture can remain visible.

Can this sponge control oily skin?

No, the sponge does not control oil. Use light layers and clean the sponge after each use. Old residue can spread across the face. Clean tools help, but they are not magic.

How can I choose a suitable sponge?

Look for a springy texture that feels comfortable in your hand. Avoid stiff surfaces, cracks, strong odors, or shedding material. A good sponge should expand evenly when damp. Small checks matter.

How should I clean and dry the sponge?

Wash it after each use with lukewarm water and a mild cleanser. Work cleanser through both curves. Rinse until the water runs clear. Let it air-dry fully in a ventilated place.

When should I replace the sponge?

Replace it when stains remain after washing, tears appear, or bounce disappears. A persistent smell also matters. There is no fixed replacement date. I sometimes keep tools too long, so regular inspection helps.

Conclusion

Choosing the right Dual Curve Makeup Sponge starts with understanding how its curved surfaces and edges can support different steps in a makeup routine. Consider your skin type and the coverage you prefer: a softer, more flexible sponge may suit light, sheer application, while a firmer texture can offer greater control when building coverage. The sponge’s material, shape, and edge details also affect how easily it reaches areas around the nose and eyes, blends larger sections of the face, and creates a smooth finish.

Before selecting one, think about how it feels in your hand and against your skin, how evenly it applies product, and whether it holds up with regular use. A comfortable sponge that is easy to clean can make everyday application more practical. Rinse it thoroughly after use, allow it to dry completely, and replace it when it becomes damaged, difficult to clean, or less effective. Matching design and care needs to your routine helps you choose a sponge that works reliably over time.

Amelia

Amelia

Amelia is a professional marketing specialist dedicated to helping customers better understand innovative products, practical solutions, and the value they can bring to everyday business operations. With a strong understanding of the company’s product portfolio, market trends, and customer needs,......